Showing posts with label engine work. Show all posts

Tuesday, January 1, 2013

The Bradley GT-I: Unexpected Problems

So, when I last left off with the Bradley, remember how I said I only needed to fix the carb and get a vacuum advance distributor? Well I fixed both of those and found my next problem. The aluminum/magnesium alloy that the crankcase is made out of is extremely soft, and because of this the cylinders were loosening themselves and leaking all my compression and gasoline all over the road. So I was pretty much back at square-one. Took the entire engine out... again. And this time I stripped it down to the crankshaft. (Which looks to be in fantastic condition by the way.) 

So how does one keep a soft case from letting go of the cylinders? (Techically it's letting go of the heads since the cylinders are more like the meat and cheese in this mechanical sandwich, but whatever.) Case-savers. These cool little steel inserts that you stick into the block so you have steel on steel contact for the threads instead of steel on aluminum/magnesium al-yeah whatever. That stuff. They're about $30 including shipping. So that on top of another gasket set, (Paper gaskets tend to tear with removal and installation whether they're new or not.) as well as a few nitty-gritty stuff will leave us short some cash. Nothing too bad, but blegh. I just can't wait to actually have everything fixed on this car. 

Anyway I'm sure you're all quite bored with the preamble; so onward to the photos! 

I bought a pair of broken 205T distributors and out of the three I had I was able to make one serviceable unit. I love that orange distributor cap.


I dunno what was going on here... Have a photo of the half disassembled engine.

This is what had broken on the carburetor. It's a little pin that limits the throttle-plates range of movement. They're known to just fall out. I had some brass wire laying around that fit, so I'm using that until it falls out, then I'll invest the whopping thirty cents for a steel one glued in place. In the meantime, this works.

The crankcase came apart with much work for me. (My back! My baaack!) But inside it looks pretty clean.

Closer view of the inside. Ever wonders what the inside of your air-cooled VW's crankcase looks like? Well now you know.

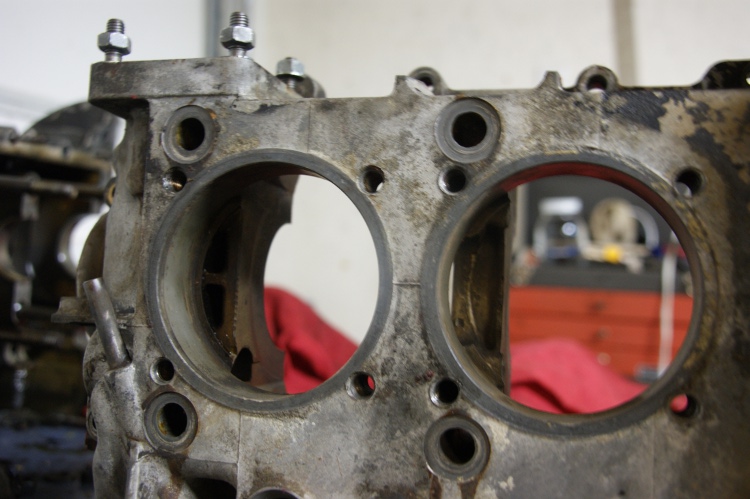
Aaand the outside. This thing needs some googly eyes at the moment.
Crankshaft. Work of beauty this is. Looks nearly new. Except for the oil finger prints.

Aand here's one of the two pile of parts for the engine. Everything is coated generously in motor oil (Except the aluminum.) to keep it from rusting in this humidity. But I still worry.


Anyway, yeah. There's the Bradley thus far. Next post I'll have the case-savers in and put the whole thing back together. I'll also paint the engine shroud sometime between then and now. Until next time. Peace out!

Thursday, October 18, 2012

Day 4: Retirement

Well, day four was exciting, sad and happy all in one. I got a buyer for some essential engine parts so I cranked the girl up and took her for one last ride to say goodbye for now. A good hour or so was spent zooming around on our local streets here taking some of my family members for one last ride in the old family car before I put her out of commission for an unknown amount of time. Now, there is something worth stating here. With the removal of the intake, (Excluding the MAF I had to temporarily put it back on to start the car.) exhaust and all that weight the MPV already acts like a sports sedan, and pulled 0-60 in a little under seven seconds with the overdrive on of course. It was a lot of fun to put the car through her paces one last time.
But then I had to move on and remove the distributor rendering the car undriveable for obvious reasons. Pretty straight forward and easy, but this marks a turning point, I'm actually doing this, I don't have the money yet, but hopefully something with come through and I can get started in earnest. Whether I sell enough parts to fund this or I get a part-time job I don't know but I certainly hope for either, but with the removal of a key part of the engine this signifies no going back to the old JEV6 now. The family car has been laid to rest and a workhorse for our family shall never be the same again...
Now the real adventure starts, turning a minivan/SUV crossover into a SCCA worthy race car.


Drove down the road to a gravel parking lot to get some final pictures of her before I retire the old JEV6.


The stickers shall be coming off when I repaint her.


Drove back home and popped the hood to get to work.
The distributor all hooked up like it's supposed to be.


After you pull the spark plug wires and remove the connectors from the distributor this is the only bolt holding it down. This is mostly a reference picture so we can get a good idea of where to set the distributor to get started with ignition timing. (Hopefully I won't be doing this again on this engine, but you never know.)


Removed. Noooo! There's a hole in my engine now! Plugged it with a red mechanics rag.


Also pulled the fan, fan shroud, and fan clutch off. Whee. Makes the engine compartment start to look really empty.


 Here's the fan clutch. This is not an original clutch, the original is in a box somewhere on one of my workbenches needing to be fixed.


Distributor after it was pulled off. Nothing special really, it's the original and it's in really good condition, my buyer is getting a steal of a price for it because I'm so desperate for the money. Anyway I'll get the gunk cleaned off of it and packed away in a box for shipping later.


And that's it for day four. Didn't do much aside from those joyrides. Heh, Imma miss being able to drive this girl up and down the driveway occasionally.